NOTE: We are no longer adding new features to Set List Maker. We recommend our newer product, BandHelper, for the latest design and functionality.
Adding lyrics and chords to your songs
You can type or copy and paste lyrics and chords into your song records. Then a document button will appear in song lists, which you can tap to view the lyrics and chords. Some of this info is covered in a tutorial video. Read on for complete details:
Note: Adding lyrics is similar to attaching documents, but not the same. You can use this comparison chart to understand the differences.
- To add lyrics to Set List Maker, tap the edit button for a song, then scroll down to the Lyrics field. You can type directly into the field, or copy and paste lyrics from a web page or a document.
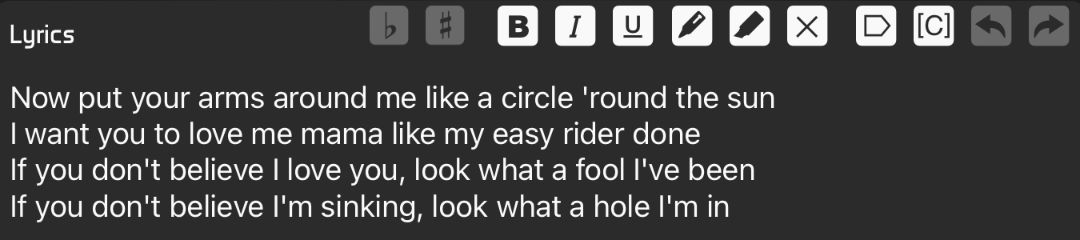
- When typing in the Lyrics field, a toolbar will appear above the keyboard with buttons to sharp and flat symbols and other useful chord symbols.

- After entering lyrics, you can apply basic formatting—bold, italic, underline, color and highlight—using the formatting toolbar at the top of the Lyrics field. On larger devices that have enough room for it, you can also use a Clear Formatting button (X icon) to remove formatting from the selected text. You can also use the undo and redo buttons in this toolbar if needed.

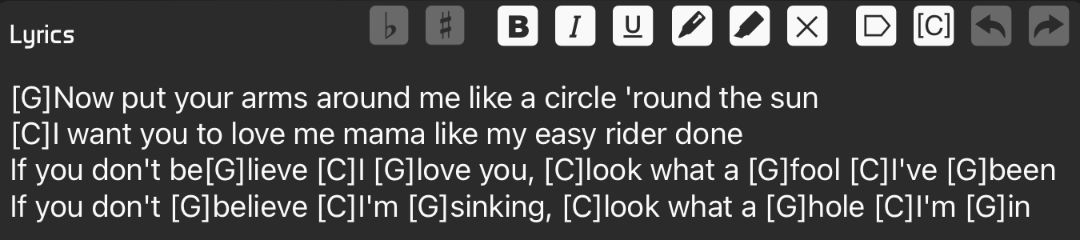
- If you want to include chords within your lyrics, you can surround them with ChordPro-style square brackets. Then Set List Maker will automatically color them according to Settings > Appearance > Chords Color. It will also place them above the corresponding words, or inline, according to Settings > Appearance > Bracketed Chords. You can also place instructions like "pause" or "harmony" in square brackets. You can even toggle the visibility of the bracketed chords by opening the document toolbar and clicking the Bracketed Chords button ([C]).
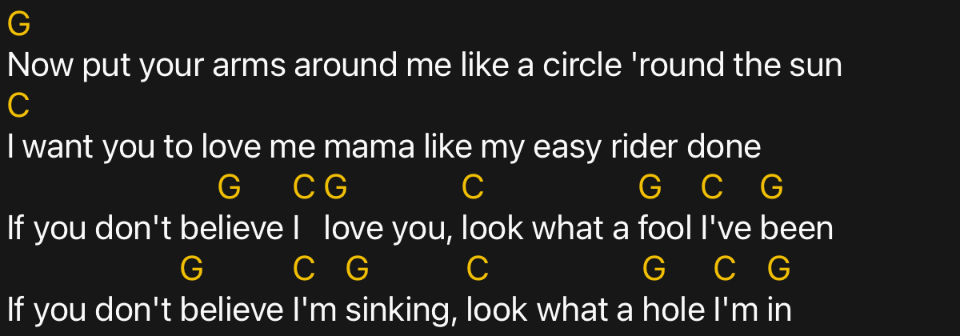
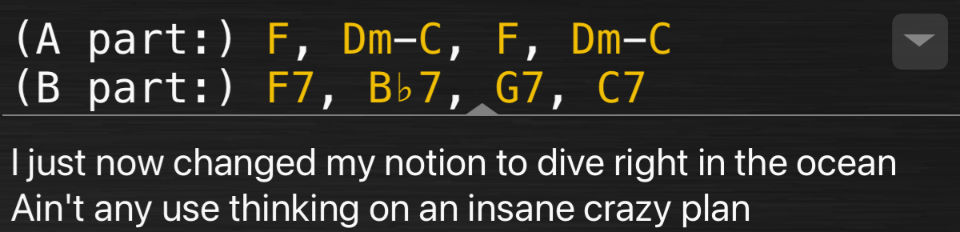
- Set List Maker will also recognize chords that you position manually above your lyrics lines, as in the previous picture. However, you should first choose one of the monospace fonts at Settings > Appearance > Lyrics Font to get consistent spacing across devices. You will also need to reposition these chords if you edit your lyrics, and you can't easily switch between showing the chords on separate lines, inline or hidden. To take advantage of those features, you can convert manually positioned chords to ChordPro positioning with the ChordPro tools button ([C]).
- If you use manually positioned chords in the Lyrics field but your lyrics include square brackets around text labels like "Verse" and "Chorus" labels, those square brackets will interfere with the chord recognition. You can remove those square brackets with the ChordPro tools button ([C]), then add bold, italic or color to these labels instead.
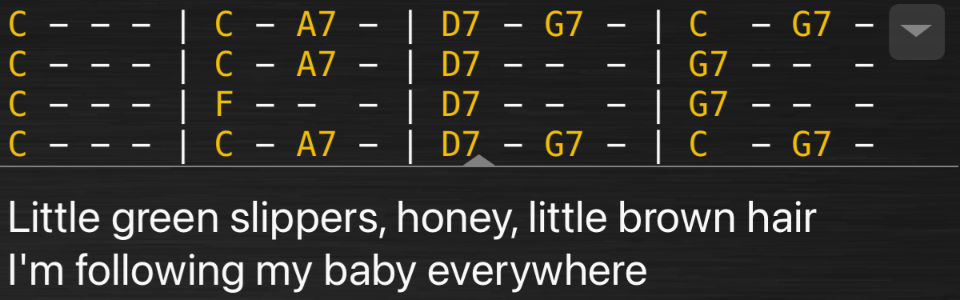
- Instead of placing chord names within the lyrics in the Lyrics field, you can enter just the chord progression into the Chords field. This field will then appear above the lyrics field when you view your lyrics, with the lyrics scrolling beneath it. You can resize the chords and the lyrics separately by pinch-zooming on the two separate areas of the screen. You can also toggle the visibility of the chords by tapping the divider line. Note: the Chords field is for chords only and is not scrollable. If you want to keep lyrics and chords in the same field, you will need to use the Lyrics field.
- If you are using the Chords field, or manually positioned chords in the Lyrics field, and you want to include headings like "Verse" or instructions like "2x" on the same line as some chords, you must surround that text with parentheses to avoid interfering with the chord recognition. You can then turn on Settings > Appearance > Hide Parentheses Within Unbracketed Chords to hide the parentheses when viewing the song.
- You can automatically transpose your chords using the flat (b) and sharp (#) buttons at the top of the Lyrics and Chords fields. This transposes all the chords up or down a half-step at a time. To choose between enharmonic notes, Set List Maker will add a sharp if moving to a higher note or a flat if moving to a lower note. So if, for example, you have the chords E A B and tap the sharp button once, Set List Maker will change the chords to F A# C. You can change this to F Bb C by tapping the sharp button again to get F# B C#, then tapping the flat button to get F Bb C.
- You can easily jump to different places in the lyrics with the on-screen hotspots or a remote control button or foot switch by adding markers to the lyrics. Just click in a line of lyrics and click the Marker button
 in the editing toolbar. A marker symbol will appear at the start of that line of lyrics. When your lyrics contain markers, all the Next Page and Previous Page functions (including the on-screen hotspots, automation events and app control actions) will jump to the marker positions instead of the page positions.
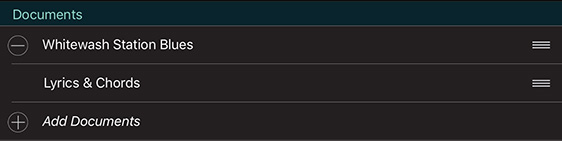
 - After entering lyrics or chords, a new item will appear in the Documents list in the song edit window. If you're also attaching documents to the song, you can drag the "grip" icons to rearrange the sequence of documents and lyrics:
- After saving the song, a document button
 will appear when you view the song. You can tap the button to view your lyrics full-screen in most windows, or within the document viewer in the song view in layouts that contain a document viewer.
When you view your lyrics from the Songs list or from a song in a show, you can use the following features:
- Swipe up or down to scroll through long lyrics, or tap the top or bottom third of the lyrics to jump to the previous or next page.
- Tap the left or right third of the lyrics to switch to adjacent documents, if documents are attached to the same song.
- Pinch to resize the lyrics or chords text.
- If you're showing lyrics over the top of your song layout, double-tap the center of the lyrics to hide them again.
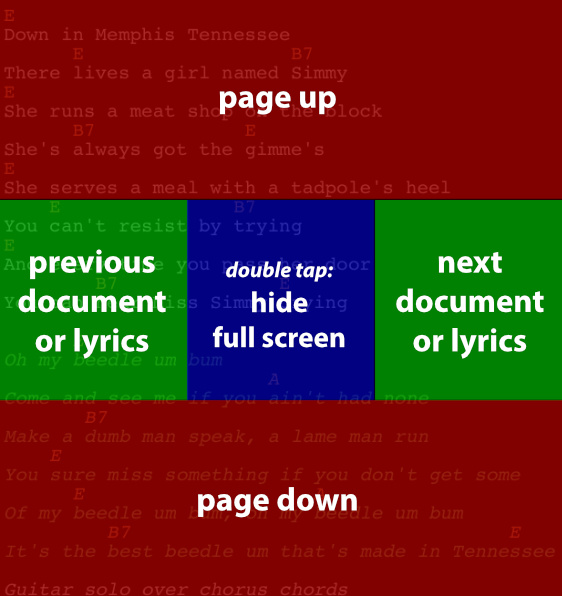
- Tap the triangle icon in the top right corner to show the document toolbar, which has buttons to...

- Hide the document viewer, if showing above your layout (not pictured here)
- Switch to the previous document, if documents are attached to the same song
- Switch to the next document, if documents are attached to the same song
- Start or stop auto-scrolling
- Transpose up
- Transpose down
- Save the text size after pinch-zooming the lyrics or chords
- Reset to the default text size
- Hide or show the Chords field
- Hide or show bracketed chords
- Show the chords as Roman numerals or chord names
- Speak the text of the Lyrics field
- Long-press a line of lyrics to highlight that line and scroll it to the middle of the screen. You can record these highlights in an automation track to create a karaoke-style lyrics display, with each line highlighted in time to the music.
- If an arrow appears in the document icon, tap it to begin auto-scrolling.
Here are some additional notes about adding lyrics and chords:
- You can display your lyrics in two columns if you edit your layout, tap the document viewer, tap its options button in the top right corner, and set Presentation to 2 Columns. Or you can set the number of columns for individual songs with the Presentation setting that appears below the Lyrics field on the song edit page.
- If you are using an external display with an iOS device, that display will mirror your entire screen by default. Alternatively, you can set Settings > General Settings > External Display to Document, and then the external display will only show the lyrics and chords when you view them from within a show. Your show layout does not need to include a document viewer to use this feature, so you could view a list-only layout or other information on your device display and lyrics on your external display.
- You can select the font used for all lyrics in Settings > Appearance > Lyrics Font. Chords always use a monospace font so that you can align your chords like a chord chart.
- You can select the alignment used for all lyrics (normal, centered or reversed) by editing your layout, selecting the document viewer and clicking the options button in its top right corner.
- To choose between enharmonic notes when transposing manually, Set List Maker will add a sharp if moving to a higher note or a flat if moving to a lower note. For example, if you have the chords E A B and tap the sharp button once, Set List Maker will change the chords to F A# C. You can change this to F Bb C by tapping the sharp button again to get F# B C#, then tapping the flat button to get F Bb C. To choose between enharmonic notes when using the Personal Transpose function, you can set With Enharmonic Spellings to sharp or flat.
- If you are using the Chords field, or the Lyrics field with a monospace font, Set List Maker will display flat symbols as a "b" character, because a real flat symbol is not sized correctly for chord alignment. You can still use real flat symbols when editing your chords, in case the flat symbol is supported better in future OS versions and this workaround is removed.
- Set List Maker will recognize the letter H for a B chord and the letter B for a Bb chord if Settings > General Settings > German Chord Names is turned on.
- Set List Maker will recognize solfege chord names if you surround them in square brackets in your lyrics. Set List Maker supports title case or upper case names (Do or DO) and supports Si or Ti for the seventh note when positioning and coloring, but only supports Si when transposing.
- If the on-screen keyboard doesn't leave enough room for your content on a tablet in landscape orientation, you can try editing in portrait orientation, or try using the split keyboard on iOS.


