NOTE: We are no longer adding new features to Set List Maker. We recommend our newer product, BandHelper, for the latest design and functionality.
Attaching recordings to your songs
If you want to play backing tracks on stage or just keep a reference recording handy for rehearsals, you can attach recordings to your songs in Set List Maker. You can watch a tutorial video, or read on for details:
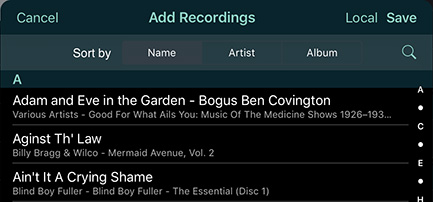
- Go to the Songs list, click a song title and scroll down to the Recordings list, which will show any recordings already attached to the song. Then tap the Add Recordings button.

- This will open a list of all the recordings in Set List Maker's data folder. You can tap the buttons at the top of the window to sort them in different ways, or tap the Search button to search for a recording. If you want to attach a file that you haven't copied into the app yet, you can tap the Import button at the top of the Add Recordings window, then select files from a local folder or cloud storage service, which will copy them into the app's data folder and add them to this list. On iOS and macOS, you also have the option to select a recording from your iTunes Music Library, by tapping the iTunes button. (This only works with recordings that are purchased, downloaded and not DRM-protected. The iTunes list might load slowly if you have a lot of recordings, or an older device with a slower processor.)
- Tap the recordings you want to attach to your song; a checkbox will appear next to each recording you've selected. When you're done selecting recordings, tap Save.
- Your selected recordings will be added to the Recordings list on the song edit page. If needed,
you can rearrange this list by dragging the "grip" area
to the right of each recording. The first recording in
the list will be the default recording throughout the
app. When you leave the song, your changes will be saved automatically.

- On iOS and Android 10+, your recordings will be stored within Set List Maker's data folder. You can optionally copy recordings there using the Import button at the top of the Recordings list. On iOS, you can also copy them using the Share or Copy To function from another app, the iOS Files app, iTunes File Sharing on older Mac versions or the Finder on Mac Catalina and later. On Android, you might be able to copy them using the Android Files app or another file management app, but Google is phasing out this capability.
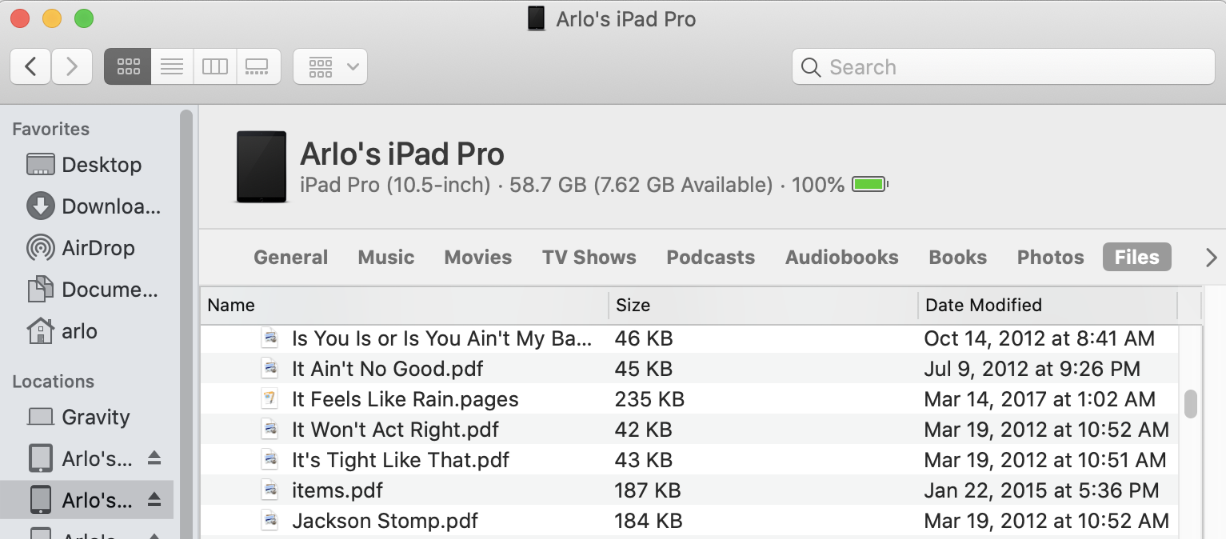
- On Android 9 and earlier or macOS, apps don't have a designated data folder. Instead, you can create a folder anywhere on your device, copy your recordings there, then select that directory in Settings > General Settings > Defaults > Recording Directory. If you need to move or rename that directory in the future, or the device's directory structure changes through OS updates, you can update that setting and any recording links will be preserved.
After you've attached a recording to a song, you should see a
recording button ![]() appear
when you view the song.
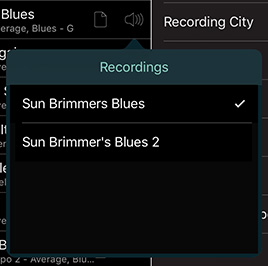
Tapping the button plays the default recording, which is the first one in
the list for that song (unless you change Settings > General Settings > Defaults > Recording). If you have attached more than one recording,
you can tap and hold the button until a submenu appears, then
tap the desired recording name.
appear
when you view the song.
Tapping the button plays the default recording, which is the first one in
the list for that song (unless you change Settings > General Settings > Defaults > Recording). If you have attached more than one recording,
you can tap and hold the button until a submenu appears, then
tap the desired recording name.
When you play a recording from the Songs list or from a song in a show…
- On the song edit page or the Recordings page, a recording toolbar will appear at the bottom of the page. This toolbar will only appear in the show view if the recording controls are included in the current layout.
- The recording toolbar's next and previous buttons will play adjacent recordings, if multiple recordings are attached to the song. You can also tap and hold the play/pause button to jump directly to any of the attached recordings.
- The recording toolbar will include a second row with skip, loop and speed controls in the set list view, if it is sized large enough in the layout. You can adjust the skip amounts at Settings > Audio & MIDI > Recording Skip Amount. You can tap the loop buttons to set start and end points, and tap them again to turn off the looping. You can slide the speed control to change the playback speed, and double-tap it to return to the normal speed.
- By default, the audio will stop when Set List Maker reaches the end of the recording. But you can configure specific layouts to automatically select the next song and start its recording. First, go to Settings > App Control, click Start Recording and set it to Layout Actions > Song Auto-Selection. Then go to Layouts > [layout name] > Edit Details and turn on Select Next Song On Song Completion. Then you can view a show and play the recording for the first song, and when that recording finishes, Set List Maker will select the next song automatically, and its recording will play, and so on until you reach a pause, a set break or the end of the set list. To only auto-advance between linked songs, you can add the ...Only Between Linked Songs setting. Set List Maker will wait for the time you defined in the show as the Time Between Songs before starting the next recording, unless you also turn on the ...Ignoring Time Between Songs option. If you sometimes want to auto-advance through the recordings and sometimes not, you can copy your layout and name the copy "[layout name] Auto-Play," and change these settings only in the new copy. Then you can choose one layout or the other depending on whether or not you want this behavior.
- By default, the audio will stop when you change songs. If you want to preview different songs while a recording for the current song is still playing, you can turn on Settings > Audio & MIDI > Continue Audio When Changing Songs. However, the audio will still stop if you leave the show view.
Here are some additional notes about playing recordings:
- Set List Maker can play any audio format that the built-in Music app can play, but it cannot play DRM-protected files such as those purchased from the iTunes Music Store before 2009. In iTunes, you can convert these files to unprotected MP3 or AAC files and attach those versions to your songs.
- Set List Maker can only play files that are installed on your device, while the iOS Music app can also play files from iCloud. If you see a recording in the Music app that does not appear in Set List Maker, you can tap the cloud icon in the Music app to download it to your device.
- If you are currently linking to iTunes recordings on iOS, but want to update to the newer method of linking directly to recordings in your app directory, you can copy your recording files into Set List Maker as shown in the first step on this page, then click Help > Utilities > Replace iTunes w/ Local Recordings. This will replace any links to iTunes recordings with links to local recordings that have the same filenames as the iTunes titles. You can use this function multiple times if you add your recordings in multiple batches. We recommend exporting a backup of your database before using this utility.
- If you have a recording that you want to access from any song, such as a sound logo for your band, you can turn on the Pinned To All Songs option on its edit page. Then the recording will always be available from the recording button as if it is attached to every song. If you include the Multiple Recording Buttons in your layout, you can set that to show only the song recordings, only the pinned recordings or both (the default is both).
- On iOS, you can optionally play two recordings at once, and if you connect a USB audio interface to your device, you can route each recording to a different output port. This is useful for sending a backing track to a house mix and a click track to a monitor mix. To play two recordings at once, turn on Settings > Audio & MIDI > Audio Options > Play First Two Recordings Together. To route the recordings to different output ports, select the ports in Settings > Audio & MIDI > Audio Options > Recording 1/2 Output Port.
- Your song layouts can include an on-screen volume slider, which controls the volume for any audio generated by Set List Maker. This is different than the overall device volume, which you can control using the hardware buttons on the side of your device. If you move the volume slider to the left or right of the middle position, Set List Maker's audio will play softer or louder compared to other apps. You can double-tap the volume slider to return to the default, middle position. You can also adjust the app volume on the fly by assigning a remote control device such as a Bluetooth or MIDI foot switch to the Volume Up and Volume Down app control actions.
- If your recordings come from different sources and have different volume levels, you can save a volume override value for each recording. Navigate to the main menu for your database, then tap Recordings, then tap the name of a recording and use the stepper buttons to raise or lower the playback volume.
- Similarly, you can set the panning of a recording with the Pan slider on the recording edit page. Panning a stereo recording doesn't mean that sound from one channel will move to the other channel; it simply means that the relative volume of the two channels will be adjusted.
- If you are practicing with a recording, you can change its pitch, to play in a different key or adjust for an out-of-tune recording. See the Advanced Audio page for more info.
- If you're using backing tracks in performance and want to smoothly end a song, you can set a value for Settings > Audio & MIDI > Fade Out Recordings. Then when you click the button to stop a playing recording, it will fade out over that duration rather than stopping immediately. If you want to stop it immediately, you can click a second time.
- On Android 10+, you can no longer select a custom location to store your attached document and recording files, but you can still use a removable SD card if you have one installed. Turn on Settings > General Settings > Use Removable Storage, and then Set List Maker will save imported files to and load files from the /Android/data/com.arlomedia.setlistmaker/files folder on the card.
- If you export your database to another device, Set List Maker will copy the title, album and artist (iOS) or file path (Android) for each attached recording. If you install the recording in the same location on the other device, the recording icon will appear for playback on that device. If the recording icon does not appear after copying, please be sure that the recording is available on the other device with exactly the same title, album and artist (iOS) or path (Android). On Android, only the part of the file path after the Settings > General Settings > Default > Recording Directory needs to match. (If you switch to BandHelper, it will copy your recording files to all the devices in your band.)


