NOTE: We are no longer adding new features to Set List Maker. We recommend our newer product, BandHelper, for the latest design and functionality.
Using advanced audio features
Set List Maker has some advanced audio features you can take advantage of. Read on for more details:
Note: Advanced audio requires an in-app purchase.
Multi-track playback (iOS/macOS only)
- Normally if you attach multiple recordings to a song, only one will play at a time. But you can play up to eight stereo or mono recordings at a time with the Settings > Audio & MIDI > Audio Options > Play Recordings Together. By changing this setting, you can play different combinations of recordings in different situations -- for example, you can attach a click track, a drum track and an effects track, but not play the drum track when a drummer is on the gig.
- To use this setting, you will need to attach the same types of recordings in the same order to every song. For example, always attach a click track in the first position, a drum track in the second position and an effects track in the third position.
- To play the recordings together, you can click the single recording button or the play button in the recording controls in your layout, or use the Start/Stop Recording, Start Recording or Start Recording 1 app control action, or use the Play Default Recording or Play Specific Recording (with the first recording in the song) automation event. If you click one of the Multiple Recording Buttons, or use the Start Recording 2-10 app control action, or use the Play Specific Recording (with anything but the first recording) automation event, only the selected recording will play.
- To help remember your setup, you can enter descriptive labels for the recording positions in Settings > Audio & MIDI > Audio Options > Recording Position Labels, and those labels will appear in the Play Recordings Together setting. You can also show those labels instead of the specific recording names in your layouts with the Show Labels In Recording Buttons setting.
Multi-channel volume controls
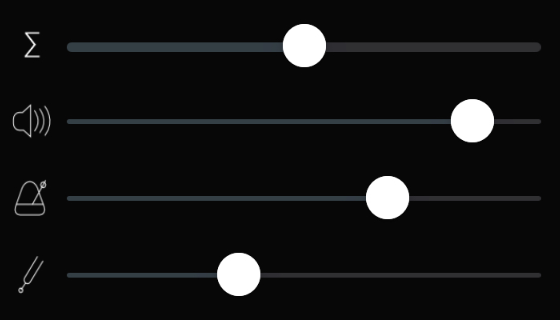
- If you add the Volume Controls item to your layout, you can expand it to reveal separate sliders for recordings (including one for each recording on iOS or macOS if Settings > Audio & MIDI > Play Recordings Together is set), videos (Android only), tempos and starting pitches. You can orient the sliders horizontally or vertically depending on how you size this layout item.
Multi-route output (iOS/macOS only)
- You can split Set List Maker's recording playback, tempo clicks, starting pitches and spoken fields to separate audio channels if you connect an external audio interface to your device. On iOS devices with a headphone jack, this is true multi-route output because you can split audio between the external audio interface and the headphone jack. On macOS, this is merely multi-channel output because you can only access one audio interface at a time.
- On macOS, open the System Settings app, go to the Sound page and set Output (for recording, tempo, pitch or speech playback) and/or Input (for in-app recording) to your audio interface. This step isn't needed on iOS.

- In Set List Maker, go to Settings > Audio & MIDI > Audio Options and turn on Multi-Route Output, then select channels for the recording, tempo, pitch, speech and/or input settings. When you click a setting, Set List Maker will display every channel of every available output device.
- Settings > Audio & MIDI > Audio Options includes separate output settings for the left and right channel of each recording. This allows you to split stereo pairs as needed across a multi-channel audio interface.
- You can play multiple recordings simultaneously if you set Settings > Audio & MIDI > Audio Options > Play Recordings Together, and you can then route them to different output channels with the Recording 1-8 Output Channel settings.
- When no external audio interface is connected, your multi-route audio settings will be ignored and Set List Maker will play all audio through the default route (the built-in speaker or headphone jack).
Inter-app audio (iOS only)
- In iOS, Set List Maker makes its audio available to other apps using the inter-app audio framework. This allows you to send audio directly into mixer or effects apps.
- Set List Maker publishes ten separate audio streams: Recordings 1-8 (if you are playing multiple recordings simultaneously with Settings > Audio & MIDI > Play Recordings Together), Tempo and Pitch. You can play the desired audio type from Set List Maker, and then it should appear as an instrument in other apps that support inter-app audio.
- You can also turn on Settings > Audio & MIDI > Play Audio In Background to continue playing Set List Maker's audio while viewing other apps.
- To set up an inter-app audio connection, you can follow these steps:
- Open Set List Maker and view a set list or smart list.
- Open another audio app and select BandHelper's audio streams as inputs.
- Return to Set List Maker and play the audio.
- If Play Audio In Background is on, you can switch between BandHelper and the other audio app while audio is playing to start/stop audio in BandHelper and view or process it in the other app.
Count Off
Instead of starting functions like recording playback and auto-scroll immediately, you can configure them to start after an audible or visible count off. This is not strictly an audio function because the count off could silent and the functions you trigger don't have to be audio related, but the most common use of this function is to start a recording after a bar or two of tempo clicks.
- Go to Settings > App Control > Actions and set Count Off to whatever trigger you want to use to start the count off. This could be a song selection, another gesture like two-fingered tap or a foot switch button press.
- While still in the Actions list, find the actions you want to trigger after the count off and set them to Layout Actions > Count Off Completion.
- Go to Settings > Tempo & Pitch > Tempo Options and set Count Off Bars to the desired amount—typically 1 or 2 bars. You can also set the tempo click sound, background flash and other settings to control how the count off looks and sounds.
- Make sure you have entered tempos for your songs. If you view a song and the tempo button is disabled, you can edit that song and fill in the Tempo field.
- View a show and start the count off using the trigger you selected in the first step. The tempo will play for the selected number of bars, then the Count Off Completion actions you configured will run.
- If you are starting recordings from a count off and a recording doesn't start on the downbeat, you can edit the recording and set the Pickup Length so the recording starts at the correct time before the downbeat.
Recording Fade and Cross Fade (Cross Fade is iOS/macOS only)
- To fade a recording before it ends instead of stopping it abruptly, you can enter a value for Settings > Audio & MIDI > Fade Out Recordings. Then clicking a recording button while a recording is still playing will fade it out over that duration. If you click again while the recording is still fading, it will then stop immediately. Clicking a recording button after it has faded out and stopped will restart the recording, rather than resume, as it does without this setting.
- To cross fade between two recordings, you can enter a value for Settings > Audio & MIDI > Cross Fade Recordings. Then if you play a recording while the previous recording is still playing, the two recordings will cross fade over that duration. If you want to cross fade between recordings for different songs, you will also need to turn on Settings > Audio & MIDI > Continue Audio When Changing Songs so the first recording doesn't stop when you change to the second song.
In-app recording
- If you want to record musical ideas during a rehearsal, you can do that within Set List Maker, and your recording will be saved along with a song for quick access later.
- To access the recording function in the show view, you need to use a layout that includes the recording controls. The predefined Practice layout includes this, or you can edit your own layout to add it.

- To start recording, first press the record button in the recording controls. This arms the recording function and changes the progress indicator to a level meter. Then press the play button and the time counter will start running to show that you are recording.

- To stop recording, press the stop button in the recording controls. Set List Maker will prompt you to enter a name for your recording. The recording will be automatically attached to the current song, but it is a good idea to indicate the song name in the recording name in case you want to use it separately later. For example, "Freebird intro" would be a better name than "Intro."
- After saving the recording, Set List Maker treats it the same way as any other recording added to the app.
- Like other recordings, in-app recordings will not be included in database exports, but you can manually copy them to other devices to access them there. (If you switch to BandHelper, it will copy your recordings to all the devices in your band.)
- Recordings will be saved in AAC format in iOS and m4a format in Android.
Playback speed control
- If you are practicing with a recording and want to slow it down, you can easily do this in Set List Maker in iOS or Android 6 and above. To access this function in the show view, you need to use a layout that includes the recording controls. The predefined Practice layout includes this, or you can edit your own layout to add it.
- On the second line of the recording controls, you will see a speed slider. You can move the slider to change the playback speed.
- To return to the default speed, double-tap the slider.
- On iOS, using the playback speed control adds about 100 ms of latency to subsequent recording and tempo playback. If you need the most responsive playback after using the speed control, you can leave and re-enter the show view to reset the latency.
Playback pitch control
- If you are practicing with a recording and want to change its pitch, to play in a different key or adjust for an out-of-tune recording, you can also do this in Set List Maker in iOS and Android 6 and above. To access this function, navigate to the Recordings list and tap the name of the recording to show its edit page.
- On the recording edit page, you can change the Pitch Shift (coarse) or Pitch Shift (fine) settings. The coarse setting changes the pitch in half-step increments and is used to change the key of the recording. The fine setting changes the pitch in one-cent increments (1/100 of a half step) and is used to adjust for an out-of-tune recording.

- You can preview your changes on a tablet by tapping the manual save button in the bottom toolbar, then tapping the recording icon in the list; or on a phone by returning to the list and clicking the recording button. You can then adjust the settings and preview again as needed.
- After changing the pitch settings, Set List Maker will alter the pitch whenever it plays the recording anywhere in the app.
- This feature is designed for practicing. If you need to pitch shift backing tracks for use on stage, it is better to edit your files with dedicated audio software and then add the edited files to Set List Maker.
- On iOS, changing the playback pitch adds about 100 ms of latency to the recording and tempo playback. If you need the most responsive playback, it is better to edit your files with dedicated audio software and then add the edited files to Set List Maker.
Standard MIDI files
- In addition to the "real" audio formats, you can also attach Standard MIDI Files (.mid) to your songs and play them back. The recording controls, speed control and pitch shift settings will work the same as with the other audio formats.
- The Android app uses Android's default MIDI synthesizer. On iOS, you must copy a SoundFont file (.sf2) into the app, then select it from Settings > Audio & MIDI > MIDI SoundFont File. You can copy multiple SoundFont files into the app, then switch between them by changing this setting.
- If you are using the iOS setting to play two recordings together, and one of the recordings is a MIDI file, that must be the first of the two.
- On iOS, the functions to change a recording's volume, pan, pitch or multi-route assignment are only available when using the new audio engine (i.e., Help > Utilities > Use Old Audio Engine is turned off).


